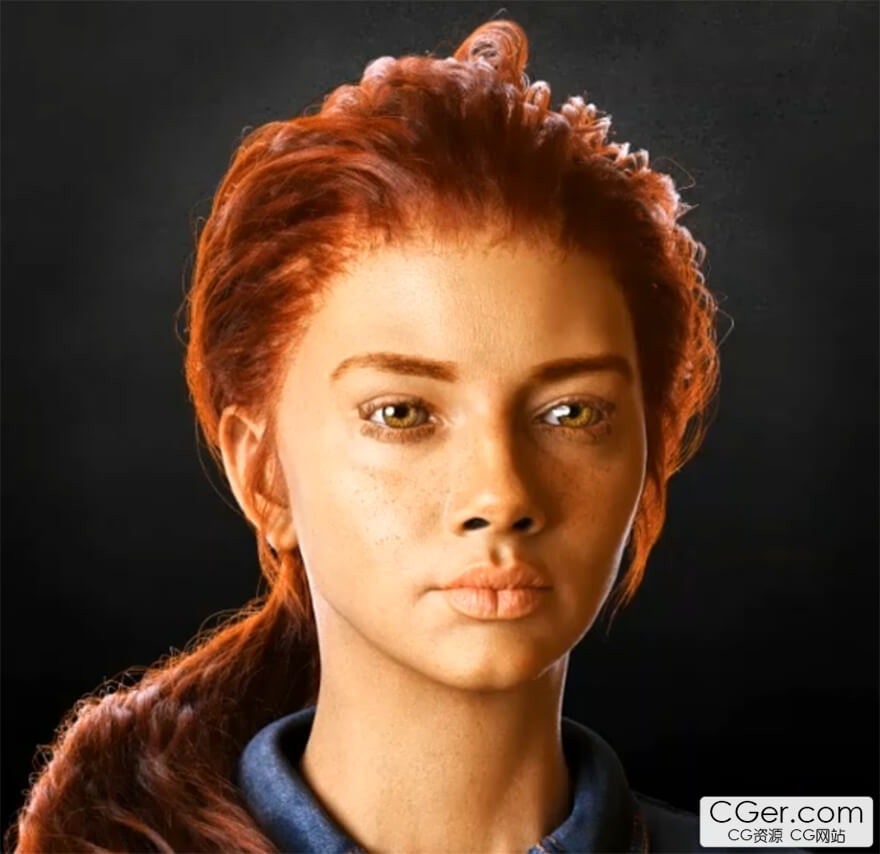
Udemy - REALISTIC 3D FEMALE FACE by Kelechi John
Udemy - REALISTIC 3D FEMALE FACE by Kelechi John
Udemy - 逼真的3D女性脸部建模教程,作者: 凯莱奇·约翰,30.6GB.
在这个逼真的女性脸部创作教程中,您将学习如何在 Maya 中将基础网格体变成逼真的脸!了解从 zbrush 中的第一个画笔描边到Maya 中最终逼真的渲染的完整工作流程。在本课程结束时,您将能够使用简单而强大的技术从参考到完成的 3D 模型创建自己的角色 vfx/游戏角色。
我们将专注于角色的面部和服装,尤其是面部,因为它通常是最复杂和最重要的部分。它将使我们能够讨论诸如面部解剖学,微观细节,服装重新拓扑学以及如何解决您在工作中遇到的常见纹理挑战等主题。

使用软件:
ADOBE PHOTOSHOP
AUTODESK MAYA
MAXON ZBRUSH
XGEN FOR MAYA
ADOBE SUBSTANCE PAINTER
PRODUCT DESCRIPTION
In this realistic female face, you’ll learn how to turn a base mesh into a realistic face in maya! Learn the full workflow from the first brush stroke in zbrush to the final realistic render in maya. By the end of this course, you’ll be able create your own characters vfx/game character from reference to finished 3d model, using simple and powerful techniques.
We'll be focusing on the face and clothing of the character but particularly the face since it's commonly the most complicated and important part. It'll allow us to talk about topics such as facial anatomy, micro detailing, garment retopology, and how to solve common texturing challenges you'll encounter in your work.
Covering the Full Process
We’re starting talking about how to align reference in photoshop
Facial Anatomy
Then prepping our model in maya and importing it zbrush, covering all specific steps and settings. From there we’ll give the character skin details using tileable maps in combination texturingxyz maps, you’ll learn powerful techniques using Smart Masks to significantly speed up texturing. Once our skin details are done, we’re starting on the color map using fill layers, creating the color map one layer at a time. You’ll also understand how to create simple and powerful roughness maps to make your characters pop.
Skin Shading Made Simple
Having done the first pass on all the base maps, we’re bringing the textures into Arnold, where we’ll set up the skin shader. Skin shading can be an incredibly complicated process, so we’ll be sure to make it simple and easy to understand. With a first pass of the skin shading done, this is the step where the character is coming together. We’re also using the FlippedNormals Eye kit, to make the character feel truly alive.
Professional and Tested Texturing Workflow
You'll learn a professsional way of sculpting likeness,exporting maps in zbrush, texturing in substance painter, working with xgen in creating hair and look develop for skin and hair in arnold, covering both texturing in Painter as well as skin shading in Arnold. This is a fast and industry-proven way of working, giving you a solid framework for all your future characters.
Skill Level
Character Face creation is perfect for 3D artists with an intermediate understanding of zbrush, Maya, and Substance. And who are interested in taking their character design to the next level! We recommend that you know how to use both Substance Painter, Maya and zbrush, as we're focusing on texturing and shading workflows, instead of going through features A-Z.
登录可见下载资源信息, 现在去登录
带到手机上看
热门CG资源
- 24个儿童玩具三维模型
- 小故障Bokeh标志logo介绍Glitch Bokeh Logo Intro视频FCPX模板
- 小故障Bokeh标志logo介绍Glitch Bokeh Logo Intro视频FCPX模板
- 创意的3DLOGO标志电影首映AE模板视频下载(含音频)
- Visible Body Human Anatomy Atlas for PC Full (3D)
- 小故障景观LOGO标志AE模板视频下载
- Juan Melara - FilmUnlimited PowerGrades - luts
- 抽象元素标题ae模板视频下载
- Anatomy 360 Anger Pain win
- Udemy - How to Create a 3D Survival Game in Godot 4.2 with GDScript
- Coloso - Solid basic theory to learn with casual characters by mogoon
- Gumroad - Nikolai Lockertsen BrushSets for Procreate [Bleed Eggs Greens] - brush
- Substance Source Project 22 - 32 Substances
- Commercial Font.Scene Release (2018-2020) - font
- 5部Digital Tutors系列的NUKE教程
- Domestika - Art Direction with Cinem 4D Spanish
- Blender 2.8-2.9 addon pack
- Cubebrush - 3d Product Rendering Studio For Blender 3d - 3dmodel
- PBR Game 3D Models Bundle 2 February 2023 29GB
- Gumroad - Designing with Confidence 2 by Anthony Jones
共 0 条评论